Chess is a game of strategy, patience, and smart decision-making. One of the key elements to mastering chess is understanding the value of each piece on the board. As a beginner, you may have noticed that some pieces feel more powerful than others, while some seem less useful. However, every chess piece has a specific role, and knowing its value will help you make better decisions during the game.
Why Understanding Piece Value Matters
Before we dive into the specific values of each chess piece, it’s important to understand why knowing the value of each piece is so critical.
Chess is a game where the goal is to checkmate your opponent’s king. But to get there, you need to use your army of pieces wisely.
Think of each piece as a part of a well-oiled machine. If one part is used poorly, the entire machine can break down. Understanding the value of the pieces helps you recognize when it’s worth trading one piece for another or when it’s best to keep your pieces on the board.
In chess, we often measure the strength of each piece using a point system. This system isn’t set in stone, but it gives us a general idea of how powerful each piece is in relation to others.
This way, when you’re faced with tough choices—like whether to exchange a knight for a bishop—you can make an informed decision.
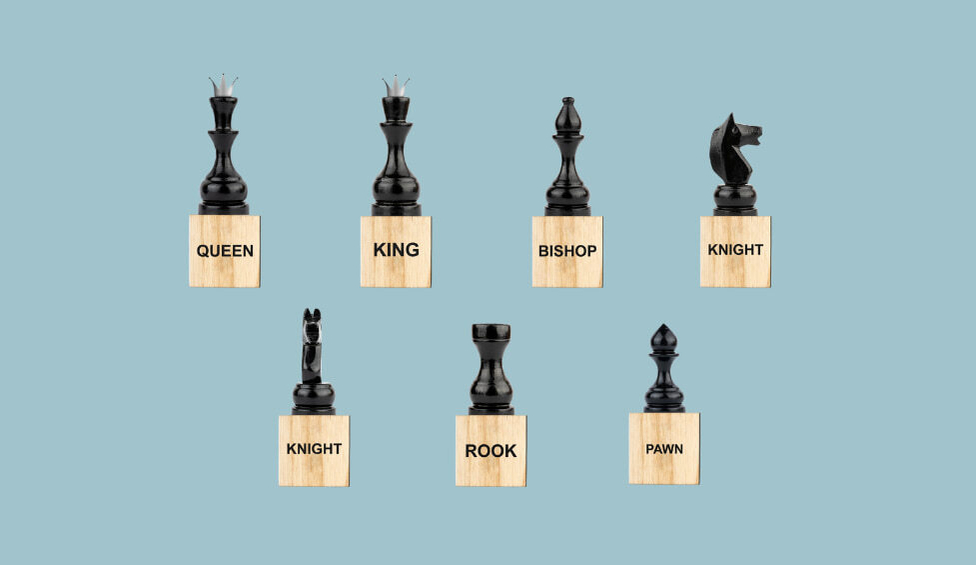
The Basic Point System
Most chess players, from beginners to professionals, use a simple point system to evaluate pieces:
- Pawn: 1 point
- Knight: 3 points
- Bishop: 3 points
- Rook: 5 points
- Queen: 9 points
- King: Infinite (because losing the king means losing the game)
Now, let’s break this down and explore what these numbers mean and why they matter.
The Pawn: Small but Mighty
Pawns may seem like the least important pieces on the chessboard because they have the lowest point value (1 point). However, underestimating pawns is a mistake many beginners make.
Even though they are small, pawns play a crucial role in the game.
What Makes Pawns Special?
Pawns are the foot soldiers of chess. They are the only pieces that move forward, and they can only capture diagonally. But here’s where pawns get interesting:
If a pawn makes it all the way to the other side of the board, it can be promoted into any piece (except the king).
Most players choose to promote their pawn into a queen, which immediately boosts its value to 9 points. This ability to promote makes pawns incredibly valuable in the later stages of the game.
Additionally, pawns are essential in controlling the center of the board, which is a key strategy in chess. Controlling the center gives you more mobility and flexibility to move your pieces, making it easier to launch attacks or defend your own territory.
When to Use or Sacrifice Pawns
Because pawns are worth only 1 point, they are often sacrificed in exchange for better positioning or to open up lanes for more valuable pieces like rooks and queens. But don’t throw them away carelessly.
A well-placed pawn can restrict your opponent’s movements or help you trap their more valuable pieces.
Knowing when to move a pawn and when to hold it back is something you’ll learn with experience, but always remember that a pawn’s real strength comes from teamwork. Pawns that work together, especially in chains, are much stronger than isolated pawns.
The Knight: The Trickster on the Board
The knight is one of the most unique and fun pieces in chess. Worth 3 points, the knight’s ability to jump over other pieces makes it a powerful tool for creating surprises on the board.
Unlike other pieces, the knight moves in an “L” shape, two squares in one direction and one square perpendicular to that. This unusual movement can catch your opponent off guard, especially if they aren’t paying attention.
Why Knights Are Valuable
Knights are excellent at targeting pieces that are hard to reach with other pieces. Because they can leap over pawns and other pieces, knights are perfect for creating forks—attacking two of your opponent’s pieces at once. Forks often force your opponent to lose a piece or make a bad trade.
However, knights have a drawback: they move slowly. While a knight’s movement is tricky, it also limits how quickly it can get across the board.
This means knights are most effective in the middle game, when there are still many pieces on the board for them to jump over and threaten.
When to Use Knights Effectively
Knights shine when they are placed in the center of the board. From the center, they can reach more squares and influence the game in a way that they can’t from the edges.
So as a general rule, try to move your knights toward the center.
In addition, knights work well in closed positions—where many pieces, especially pawns, are blocking the board. Their ability to jump over obstacles makes them extremely valuable in these types of situations, unlike bishops, which we’ll cover next.
The Bishop: The Silent Sniper
The bishop, like the knight, is valued at 3 points. However, the bishop moves very differently from the knight and plays a distinct role on the chessboard.
While knights jump around in an “L” shape, bishops move diagonally, which gives them a long range of attack. Bishops can only move along the color of the square they start on—either white or black—so you’ll often hear players talk about “light-squared bishops” or “dark-squared bishops.”
Why Bishops Are Important
The bishop’s long-range diagonal movement makes it a powerful attacking piece, especially when there are fewer pawns on the board. When the board opens up, meaning there are fewer pieces blocking the way, bishops can cover great distances quickly and threaten multiple parts of the board.
One of the major advantages of bishops over knights is that they can control both the near and far parts of the board at the same time.
In open positions, where there’s a lot of empty space, bishops are often stronger than knights because they can influence more squares.
However, bishops also come with a limitation: they can only control squares of one color. A light-squared bishop will never be able to land on a dark square. This means that if you lose your other bishop, you lose the ability to control squares of the opposite color.
Keeping both bishops on the board can help you dominate more of the chessboard and is often referred to as having “the bishop pair.”
How to Use Bishops Effectively
Bishops thrive when placed on long, open diagonals where they aren’t blocked by pawns. Early in the game, it’s common to develop your bishops by moving them to squares that allow them to control important central areas or point toward your opponent’s territory.
Placing a bishop on a good diagonal can sometimes pin an opponent’s knight or rook, preventing them from moving.
One tactical concept involving bishops is called a “bishop sacrifice.” This occurs when a player sacrifices a bishop to break through the opponent’s defenses, usually to create an opening for a more decisive attack.
Since bishops are worth 3 points, sacrificing one for a key advantage, like checkmating the opponent or winning a queen, can turn the tide of the game.
Bishops also work very well when you have a pawn structure that complements them. For example, bishops can become incredibly powerful in “fianchetto” positions, where a pawn moves forward to allow the bishop to take control of a long diagonal.
The Rook: The Powerhouse
The rook is one of the most powerful pieces on the board, worth 5 points. Its value comes from its ability to move in straight lines, both horizontally and vertically, across the entire board.
In fact, rooks are second only to the queen in terms of power, and they play a crucial role in both offense and defense.
Why Rooks Are So Valuable
Rooks control entire files (columns) and ranks (rows), which makes them great for dominating open lines. The more open the board is, the more dangerous rooks become.
When a rook is placed on an open file—one with no pawns blocking its movement—it can control that entire file, making it difficult for your opponent to move their pieces freely.
One of the most important things to know about rooks is how to use them in the endgame. As the game progresses and pieces are exchanged, rooks often become the key to winning.
Rooks are excellent at supporting passed pawns (pawns that have no opposing pawns blocking their way to promotion) and cutting off the opposing king’s movement.
The Importance of Rook Activity
A passive rook—one that’s trapped behind its own pawns or unable to influence the board—is almost useless. One of the most common beginner mistakes is leaving their rooks inactive for too long.
It’s important to activate your rooks early by moving them to open files, especially during the middle game, where they can start to play a bigger role.
Rooks are also essential in a tactic called “rook doubling.” This happens when two rooks are placed on the same file or rank, doubling their strength. When doubled, rooks can create powerful attacks and apply pressure on your opponent’s pieces.
Castling: A Special Move with the Rook
There’s one unique move involving the rook that every beginner should learn early: castling. Castling is a special move where the king moves two squares toward one of the rooks, and the rook jumps over the king to land on the square next to it.
Castling is the only move in chess where two pieces move at once, and it’s used to protect the king while also activating the rook. Castling early in the game is generally a good idea, as it safeguards your king and prepares your rook to enter the game.
The Queen: The Most Powerful Piece
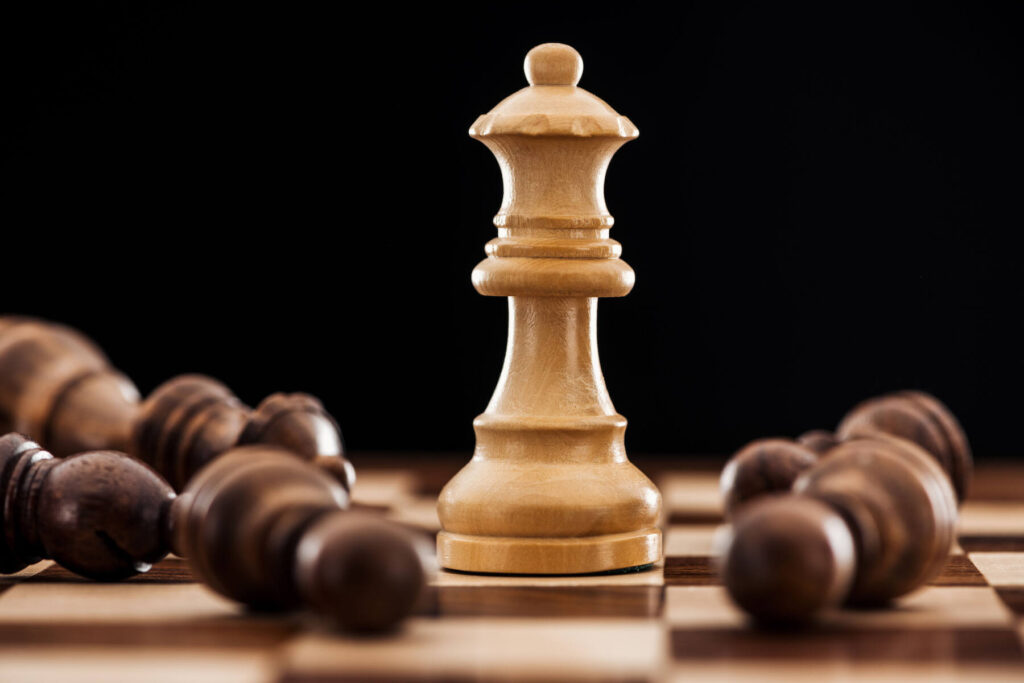
The queen is the most powerful piece in chess, worth 9 points. With the ability to move any number of squares in any direction—horizontally, vertically, or diagonally—the queen combines the power of both the rook and the bishop.
This flexibility makes the queen a key player in both attack and defense.
Why the Queen Is So Powerful
The queen’s versatility allows her to quickly switch from one side of the board to the other, making her a dangerous piece in almost any situation. Whether you need to defend a critical area or launch an attack on the enemy king, the queen can do it all.
One thing to keep in mind, though, is that because the queen is so powerful, losing her is often devastating. Beginners sometimes make the mistake of using the queen too early in the game, which can lead to her being trapped or exchanged for less valuable pieces.
While the queen is a fantastic attacker, you’ll want to wait until the middle or late game, when the board opens up, to unleash her full potential.
How to Use the Queen in the Middle Game
In the middle game, the queen can be used to support attacks on the opponent’s king, coordinate with other pieces to apply pressure, or control important squares.
However, be cautious of moving the queen too far into enemy territory without backup. A lone queen can easily be surrounded and forced to retreat or be captured.
Coordinating the queen with other pieces, especially rooks, knights, and bishops, often creates strong tactical combinations.
For example, a common tactic is the “queen-rook battery,” where the queen and a rook are placed on the same file or rank, targeting a specific weak point in the opponent’s defense.
The King: The Ultimate Goal
The king is the most important piece in chess, but not because of its power. In fact, the king is relatively weak in terms of mobility, moving only one square at a time in any direction.
The king’s value is infinite because losing your king means losing the game. That’s why the entire objective of chess is to checkmate the opponent’s king—placing it in a position where it cannot escape capture.
How to Use the King Effectively

While the king is the most important piece in chess, it’s also one of the weakest in terms of movement and attacking power. As a result, the king’s main role in the early and middle stages of the game is simply to stay safe.
However, once the game enters the endgame—when many of the other pieces have been traded off—the king becomes a powerful tool in its own right.
The King in the Opening and Middle Game
In the opening and middle game, the primary goal with your king is to protect it. One of the best ways to do this is by castling, which we briefly touched on earlier. Castling not only tucks the king safely away, but it also brings one of your rooks closer to the center of the board, where it can be more active.
Castling early is generally a good idea, as it gets the king out of the way of potential threats and prepares you for more aggressive play in the middle game.
A king left in the center of the board without castling can become a target for your opponent’s attacks, especially if the center opens up. That’s why most experienced players make it a priority to castle within the first 10 to 15 moves, if possible.
The King in the Endgame
Once most of the heavy pieces (queens, rooks, etc.) are off the board, the king’s role changes. In the endgame, the king can become a strong attacking piece.
Since there are fewer threats, the king can move toward the center of the board and participate in the action.
The king is particularly useful in helping pawns advance. As we mentioned earlier, pawns can be promoted to queens if they reach the other side of the board. The king can escort these pawns, blocking the opponent’s pieces from stopping them.
In endgames with few pieces, a well-placed king can mean the difference between winning and drawing the game.
A key strategy in the endgame is “opposition,” where two kings face each other on the board, separated by one square. The player who can force the other king to move backward often gains the advantage, allowing their own king to advance and take control of important squares.
Basic Strategies for Using Piece Value
Now that we’ve covered the value of each piece,
let’s look at some basic strategies for using this information to improve your game. Understanding the relative strength of each piece allows you to make smarter trades, build better plans, and avoid losing valuable material for no reason.
Smart Trades and Exchanges
One of the most common mistakes beginners make is trading pieces without considering their relative value. Remember that every piece on the board has a specific point value, and these values should guide your decision-making.
For example, if your opponent offers to exchange a rook for one of your bishops, you should almost always accept the trade because a rook is worth more points (5 vs. 3). However, this doesn’t mean that every trade should be accepted without thought.
The position on the board and the role of the pieces in the game also matter. Sometimes, a bishop or knight may be more useful than a rook because of how the position has developed.

Another situation where understanding piece value is critical is when you’re down in material. If you’ve lost a piece, it’s often a good idea to try and trade down—meaning you exchange more pieces to reduce the total number of pieces on the board.
If you’re down by a rook, for instance, trading off queens and other high-value pieces can limit your opponent’s ability to leverage their material advantage, increasing your chances of a draw rather than a loss.
Piece Coordination
Chess is all about piece coordination. A single powerful piece like a queen or rook can dominate the board, but when your pieces work together, their combined power is far greater than their individual value.
Knights and bishops often work well together because they cover different types of squares (knights cover both light and dark squares, while each bishop covers only one color). Rooks and queens also form powerful combinations, controlling files and ranks with overwhelming force.
Always ask yourself how your pieces can support each other. For example, a queen and rook working together can apply pressure on an enemy king, while two rooks can combine to control an entire rank or file.
Proper coordination means making sure your pieces are in harmony, and this often leads to checkmates or gaining a large material advantage.
Piece Activity
Another key principle in chess is the concept of “piece activity.” Active pieces are those that have many potential moves and can influence many parts of the board.
Inactive pieces, on the other hand, are limited in movement and don’t contribute much to your strategy.
Even if you’re ahead in material, if your pieces are passive, your opponent can still mount a strong attack. The classic example is leaving your rooks trapped behind your pawns.
If you never activate your rooks by moving them to open files, you might as well be playing without them.
Always look for ways to keep your pieces active. Move your knights to strong central squares, place your bishops on open diagonals, and get your rooks to files where they can control long stretches of the board.
Avoiding Losing Material
Beginners often lose material by leaving their pieces undefended or by walking into forks, skewers, and pins.
We’ve already touched on the importance of not trading valuable pieces for lower-value ones, but avoiding unnecessary material loss is also key.
One simple rule to follow is: Before you make any move, ask yourself, “Is my piece safe?”
Look for threats from your opponent, and make sure that any piece you move isn’t easily attacked or captured. At the same time, make sure to ask yourself if any of your opponent’s pieces are unprotected.
Loose pieces—those that aren’t defended—are often easy targets, and you should capitalize on this whenever possible.
Tactical Awareness
As you improve in chess, you’ll start to notice patterns and tactics that can win material or give you a decisive advantage. Tactics like forks, pins, skewers, and discovered attacks all involve using the value of your pieces wisely.
For example, a knight fork might force your opponent to lose a rook (worth 5 points) while you only risk losing the knight (worth 3 points).
Recognizing these tactical patterns allows you to maximize the impact of each piece.
Similarly, pins and skewers can be used to trap or win valuable material. A pin occurs when you attack a piece that cannot move without exposing a more valuable piece behind it, while a skewer forces your opponent to move a more valuable piece, leaving a lesser piece vulnerable.
Both tactics involve manipulating the value and positioning of your opponent’s pieces.
The Importance of Control in Chess
Controlling the Center
One of the most fundamental principles in chess is controlling the center of the board. The central squares—d4, d5, e4, and e5—are critical because they allow your pieces to influence the greatest number of other squares.
If you control the center, your pieces have more flexibility to move and attack in different directions. Additionally, controlling the center often limits your opponent’s options and restricts their mobility.
Why Controlling the Center Matters
The center of the board is where most of the action happens in the opening and middle game. Placing your pawns, knights, and bishops in or around the center gives you control over important lines and diagonals.
This control makes it easier to launch attacks, defend key areas, and keep your pieces coordinated.
For beginners, a good rule of thumb is to aim to control the center as soon as possible. In many openings, this means moving one or two pawns toward the center early in the game (typically d4 and e4 for white, or d5 and e5 for black).
By placing pawns in the center, you can then bring out your knights and bishops to support them, creating a strong foundation for your position.
Centralizing Your Pieces
Once the center is occupied by your pawns, the next step is to place your pieces—especially knights and bishops—in positions where they can influence the center.
Knights are most effective when placed on central squares (e4, d4, e5, or d5), where they can threaten a wider range of squares. Bishops, too, are more dangerous when they control long diagonals that cut through the center of the board.
In contrast, pieces placed on the edge of the board (often referred to as “being on the rim”) are less effective because they influence fewer squares and can become trapped more easily.
As the saying goes, “A knight on the rim is dim”—a reminder that keeping your pieces in the center is generally a better idea.
Pawn Structure and Central Control
Pawns play a crucial role in determining how the game will unfold. They control important squares, restrict the movement of your opponent’s pieces, and can even become powerful when advanced correctly.
However, poorly placed pawns or bad trades can create weaknesses in your pawn structure, which your opponent can exploit.
For instance, “isolated pawns” are pawns that have no other pawns on adjacent files to support them. While they can still be useful in attacking or controlling the center, they can also become targets for your opponent.
Similarly, “doubled pawns” (two pawns stacked on the same file) can often be a liability because they can’t defend each other.
In general, pawns should be used to control key squares and support your more valuable pieces. But be careful: every time you move a pawn, it leaves behind weak squares that your opponent can target.
Balancing pawn activity with piece coordination is a critical skill as you advance in chess.
The Role of Open Files and Diagonals
Just as the center is critical, controlling open files (for your rooks) and diagonals (for your bishops) is another important aspect of chess. Open files refer to columns on the chessboard that have no pawns.
Placing your rooks on open files allows them to move freely and dominate the board. This is particularly important in the middle and endgame, where open files often provide a pathway for rooks to invade your opponent’s territory and apply pressure.
Similarly, bishops thrive on long, open diagonals. If you can place a bishop on an unblocked diagonal that cuts across the board, it becomes a strong force that can attack, defend, or pin your opponent’s pieces.
A common strategy is to align your pieces—such as doubling rooks on an open file or placing a bishop and queen on the same diagonal—to maximize their power and increase their control over key squares.
Key Tactical Concepts to Watch For
While chess is a strategic game, tactics play a huge role in deciding the outcome of most games.
Tactics are short-term opportunities to gain a material advantage or improve your position. By understanding common tactical patterns, you’ll start to spot chances to attack or defend more effectively. Here are a few of the most important ones:
Forks
A fork is when a single piece attacks two or more enemy pieces at the same time. Knights are particularly good at creating forks because of their unique movement pattern, but queens and pawns can also fork pieces.
The most valuable forks are those that force your opponent to lose a more valuable piece, like a rook or queen, because they can’t save both pieces in time.
For example, a knight might move to a square that threatens both a rook and a queen. Your opponent will have no choice but to move one of them, leaving the other to be captured.
Practicing forks with knights is a great way to improve your tactical awareness.
Pins
A pin occurs when one of your opponent’s pieces is unable to move because doing so would expose a more valuable piece behind it. For example, if a bishop attacks a knight, and that knight is in front of the opponent’s queen, the knight can’t move without exposing the queen.
Pins are very powerful because they restrict your opponent’s mobility and can often lead to winning material.
Pins are most effective when you use long-range pieces like bishops, rooks, and queens to apply pressure across the board. Once you pin an opponent’s piece, you can often add more attackers to increase the pressure and force them into a tough decision.
Skewers
A skewer is similar to a pin, but in this case, the more valuable piece is in front of the lesser one. When the more valuable piece is attacked, it must move, leaving the lesser piece behind to be captured.
Rooks and queens often create skewers by attacking a line of pieces. For example, a queen might attack an opponent’s rook, forcing it to move and leaving a pawn vulnerable.
Skewers work particularly well in endgames when there are fewer pieces on the board, allowing long-range pieces to dominate open files and ranks.
Practicing how to set up skewers will help you find ways to win material as your opponent is forced to react.
Discovered Attacks
A discovered attack happens when one piece moves out of the way to reveal an attack from another piece. Imagine you have a rook behind a bishop on the same file. If the bishop moves, the rook is suddenly attacking whatever is in front of it.
Discovered attacks are especially dangerous because they often involve attacking multiple pieces at once or delivering a surprise check.
One of the most devastating forms of a discovered attack is a “discovered check,” where moving one piece not only attacks another piece but also puts the opponent’s king in check.
This often leads to winning material since the opponent must respond to the check first, leaving the attacked piece vulnerable.
Zugzwang
Zugzwang is a unique situation where your opponent is forced to make a move, but any move they make will weaken their position. This concept comes into play more often in endgames, where players are running out of moves and every decision matters.
Being in zugzwang often leads to losing material or even checkmate because your opponent has no good moves left.
You can set up a zugzwang by gradually improving your position and reducing your opponent’s options. Eventually, they will be forced into a situation where any move they make will lead to a loss.
Positional Play: Beyond Tactics
While tactics can win games quickly, positional play is about setting up strong, long-term plans. Understanding the value of controlling squares, creating strong pawn structures, and improving piece activity is essential for becoming a well-rounded chess player.
Here are a couple of positional ideas to keep in mind:
Strong vs. Weak Squares
In chess, a strong square is one that you control, and where you can place one of your pieces to dominate the board. A weak square, on the other hand, is one that is difficult or impossible to defend, often because it is out of reach of your pawns.
Placing your pieces on strong squares while forcing your opponent into weak ones is a great way to gain a lasting advantage.
For example, if your opponent has weakened a square near their king (like f7 for black or f2 for white), you might be able to place a knight or queen there to apply pressure and create threats.
Similarly, if you have a weak square in your own camp, try to defend it with your pieces or keep your opponent’s pieces from occupying it.
Good vs. Bad Bishops
Bishops can be classified as “good” or “bad” based on the pawn structure. A “good bishop” is one that is not blocked by its own pawns and can move freely across open diagonals.
A “bad bishop” is one that is stuck behind pawns of the same color and has limited mobility. The goal is to keep your bishop active and not trapped by your own pawn structure.
For example, if you have a light-squared bishop but most of your pawns are on light squares, your bishop’s movement will be restricted. You should look to either exchange it for a knight or open up the board to activate the bishop.
Understanding how to position your pawns and bishops in harmony is key to controlling the game.
Open vs. Closed Positions
An “open position” is one where many of the pawns have been exchanged, leaving lots of space for rooks, bishops, and queens to move freely. In open positions, long-range pieces like rooks and bishops are especially strong, and tactics often dominate.
A “closed position,” on the other hand, occurs when the board is cluttered with pawns, limiting the movement of pieces. In these positions, knights become more valuable because they can jump over obstacles, and the game becomes more about maneuvering than direct attacks.
Understanding the difference between open and closed positions will help you decide which pieces to keep on the board and which to exchange.
Wrapping it up
Understanding the value of chess pieces is crucial for improving your game. Each piece plays a specific role, from the humble pawn to the powerful queen, and knowing their strengths helps you make smarter decisions, trade pieces wisely, and spot tactical opportunities. While mastering tactics like forks, pins, and skewers will give you short-term advantages, long-term success comes from solid positional play—controlling the center, coordinating your pieces, and creating strong pawn structures.
To truly elevate your game, balance both tactics and strategy, and practice consistently. If you’re ready to take your skills to the next level, the Global School of Chess can provide expert guidance, helping you become a stronger player. Visit Global School of Chess today for personalized lessons and expert coaching.
Chess mastery takes time, but with the right foundation and practice, you’ll be well on your way to making smart, confident moves on the board!
READ NEXT: